Finance & Fees Management
Complete oversight of Fee Structures, Multi-group Collection, Automations, and the Student Wallet System.
Hierarchy: Create Fee Types (Tuition, Lab) ->
Bundle them into Fee Groups (Term 1) -> Assign to Students -> Collect.
1. Building the Financial Structure
Define what parents are paying for.
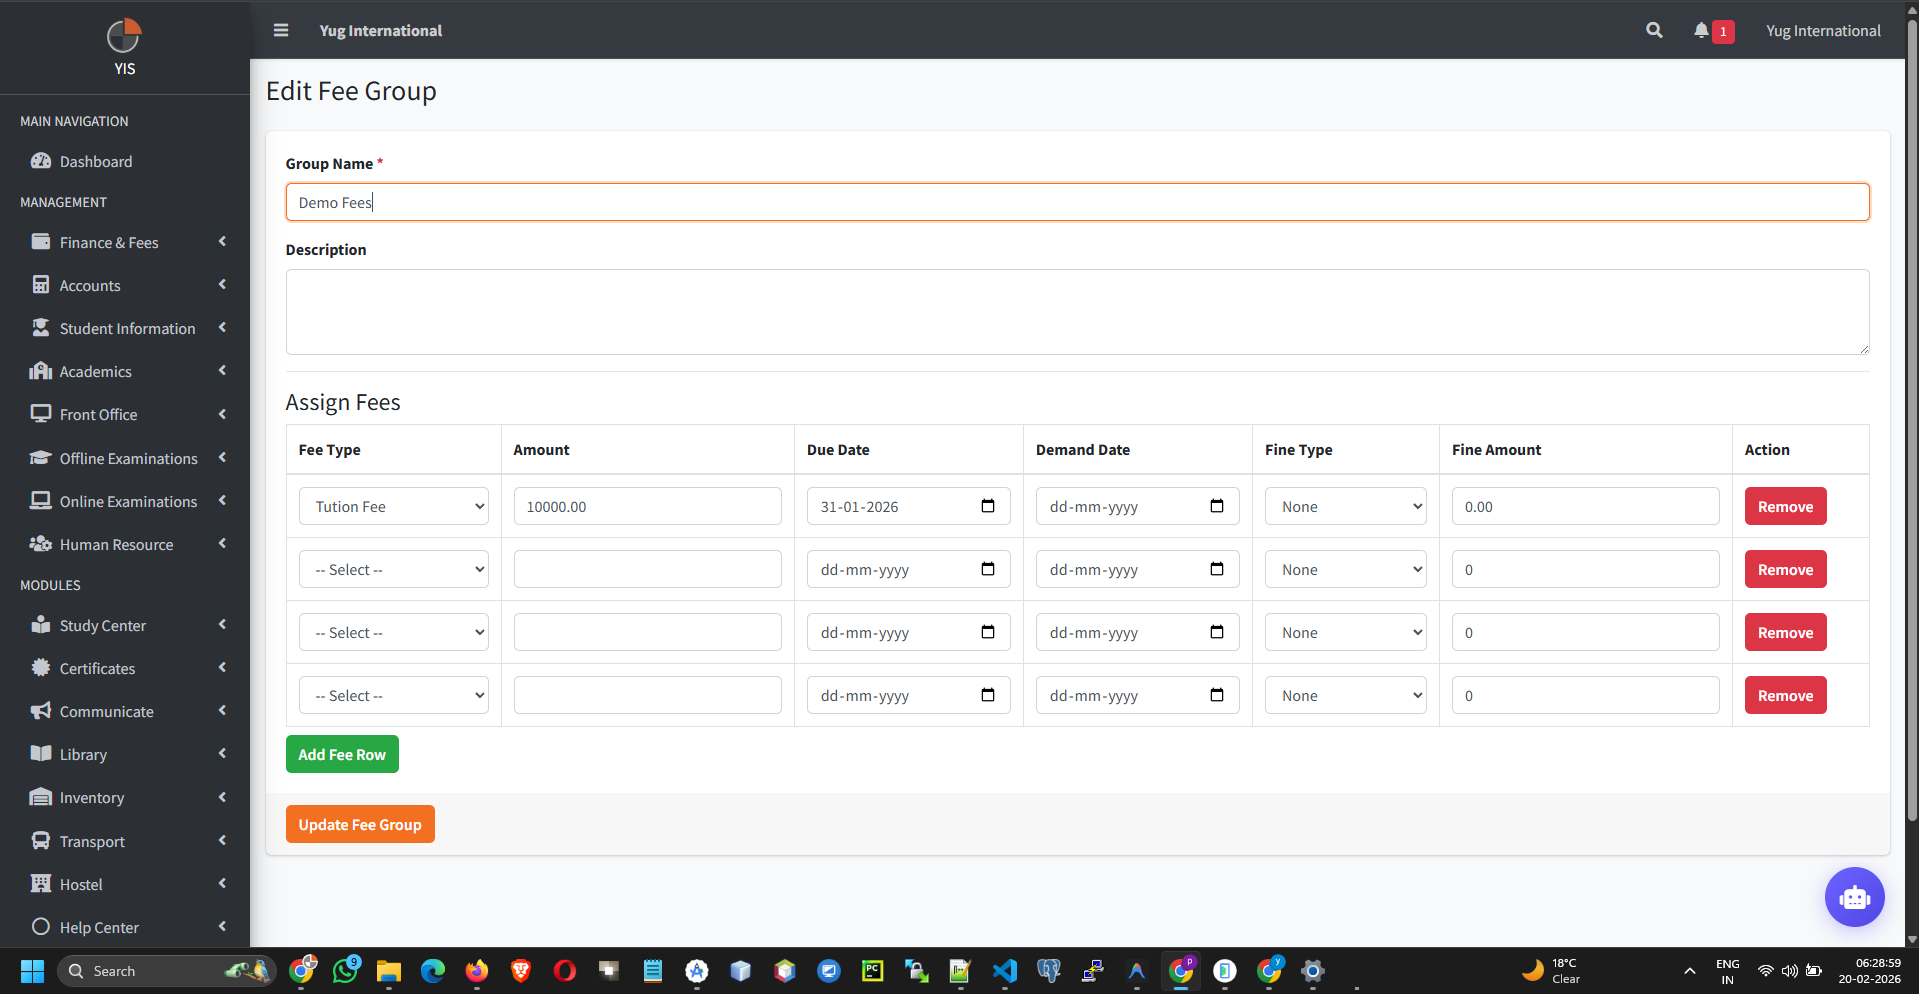
a. Fee Types & Groups
- Fee Types: Create individual components via Finance & Fees > Fee Types (e.g., Tuition, Transport).
- Fee Groups: Go to Finance & Fees > Fee Groups. Add a Group (e.g., "Class 10 - Semester 1") and attach multiple Fee Types to it.
- Due Dates: Critical. The due date set here controls when late fines begin accruing.
2. Assigning Fees (Mass Operations)
Link the financial structure to the student body.
Chunking: To prevent server timeouts on schools with 5,000+
students, the Assignment Controller processes records in database chunks of 500 automatically.
- Go to Finance & Fees > Assign Fees.
- Select the Target Class, Section, and Fee Group.
- Check off the students and save.
- Unassigning: The system will actively block you from un-assigning a fee group from a student if they have even $0.01 in recorded payments against it to prevent ledger corruption.
3. Fee Collection & The Wallet Engine
The core daily operation for cashiers.
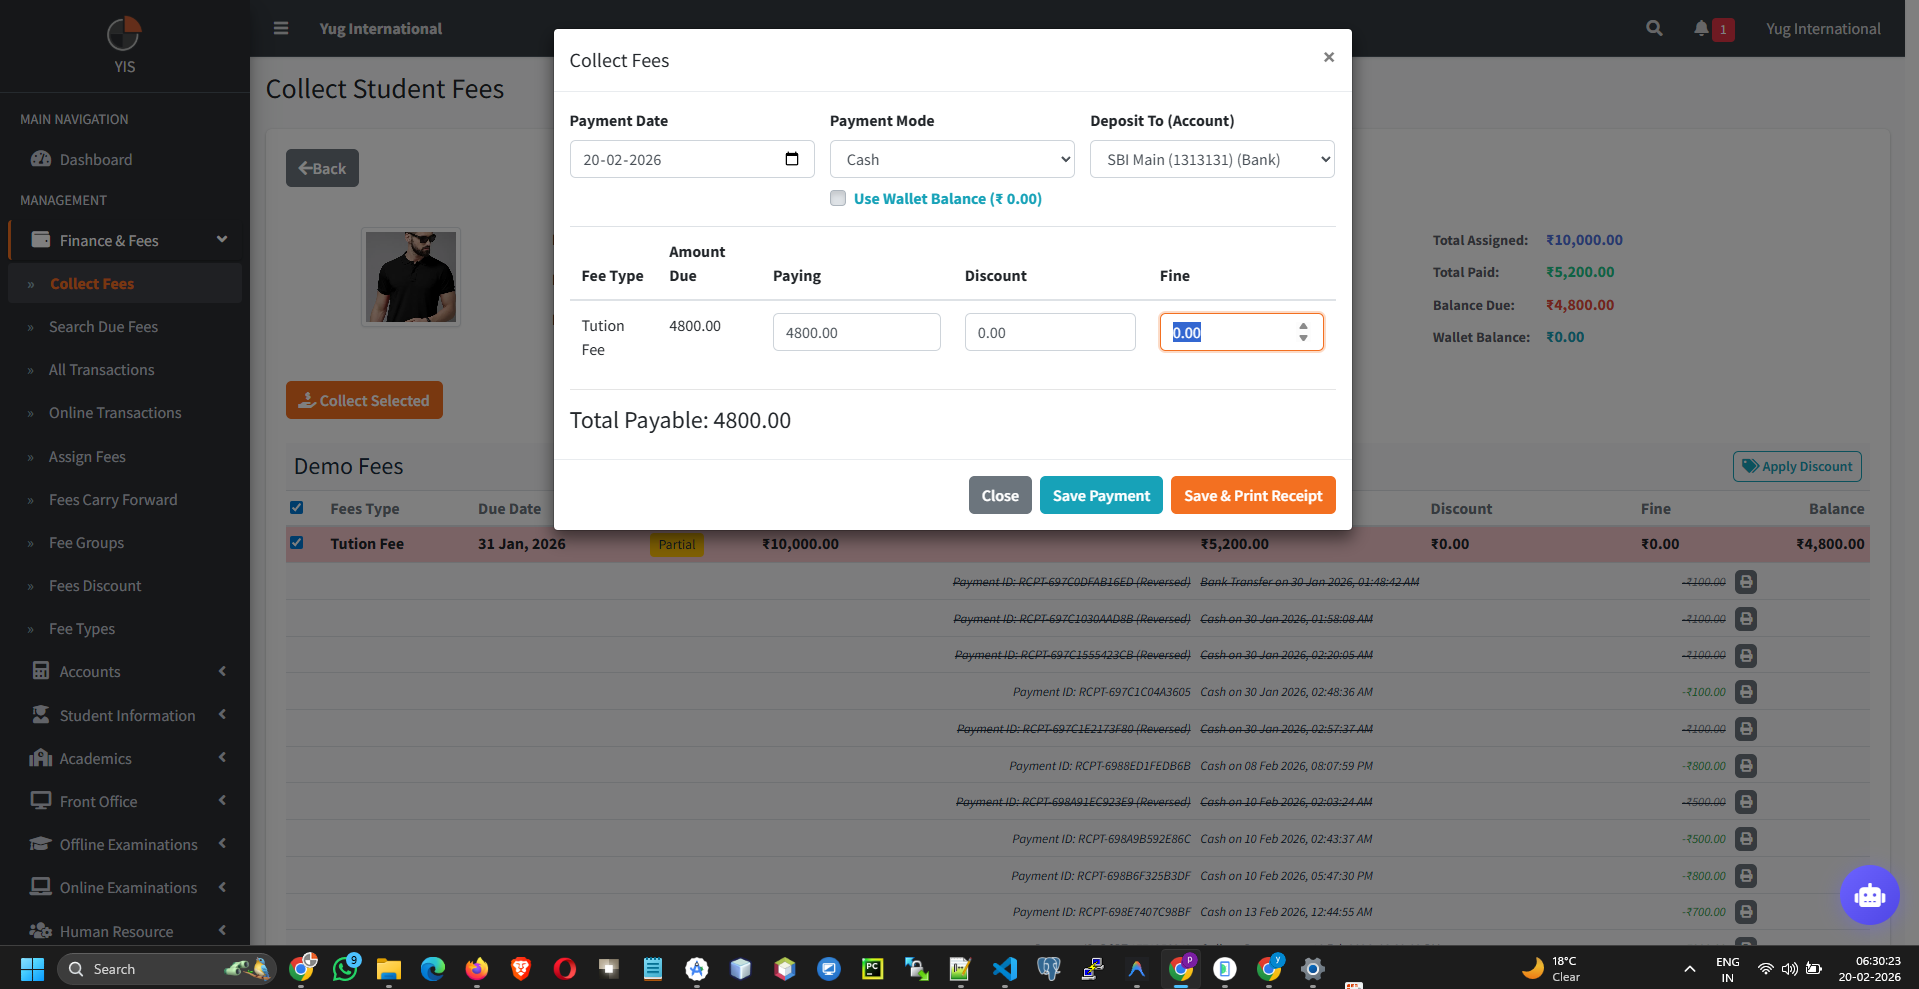
a. Standard Collection
- Go to Finance & Fees > Collect Fees. search by Student Admission No.
- The grid displays all outstanding items sorted by earliest due date.
- Click Collect Fee (+).
- Select the Payment Mode (Cash, Cheque, Online Transfer).
- Select the Target Bank Account (e.g., "Main SBI Account").
b. The Wallet Engine (Overpayments)
The system intelligently handles excess cash to prevent accounting errors.
- Wallet Credit: If a parent owes $450 but pays $500, the controller automatically caps the fee item at $450 and credits strictly $50 into the student's Wallet Balance.
- Wallet Debit: On future collections, cashiers can check the Use Wallet box to deduct the payment from the student's stored credit instead of taking physical cash.
Instant Notification: Upon successful transaction
commit, the parent receives an automated WhatsApp/Email receipt.
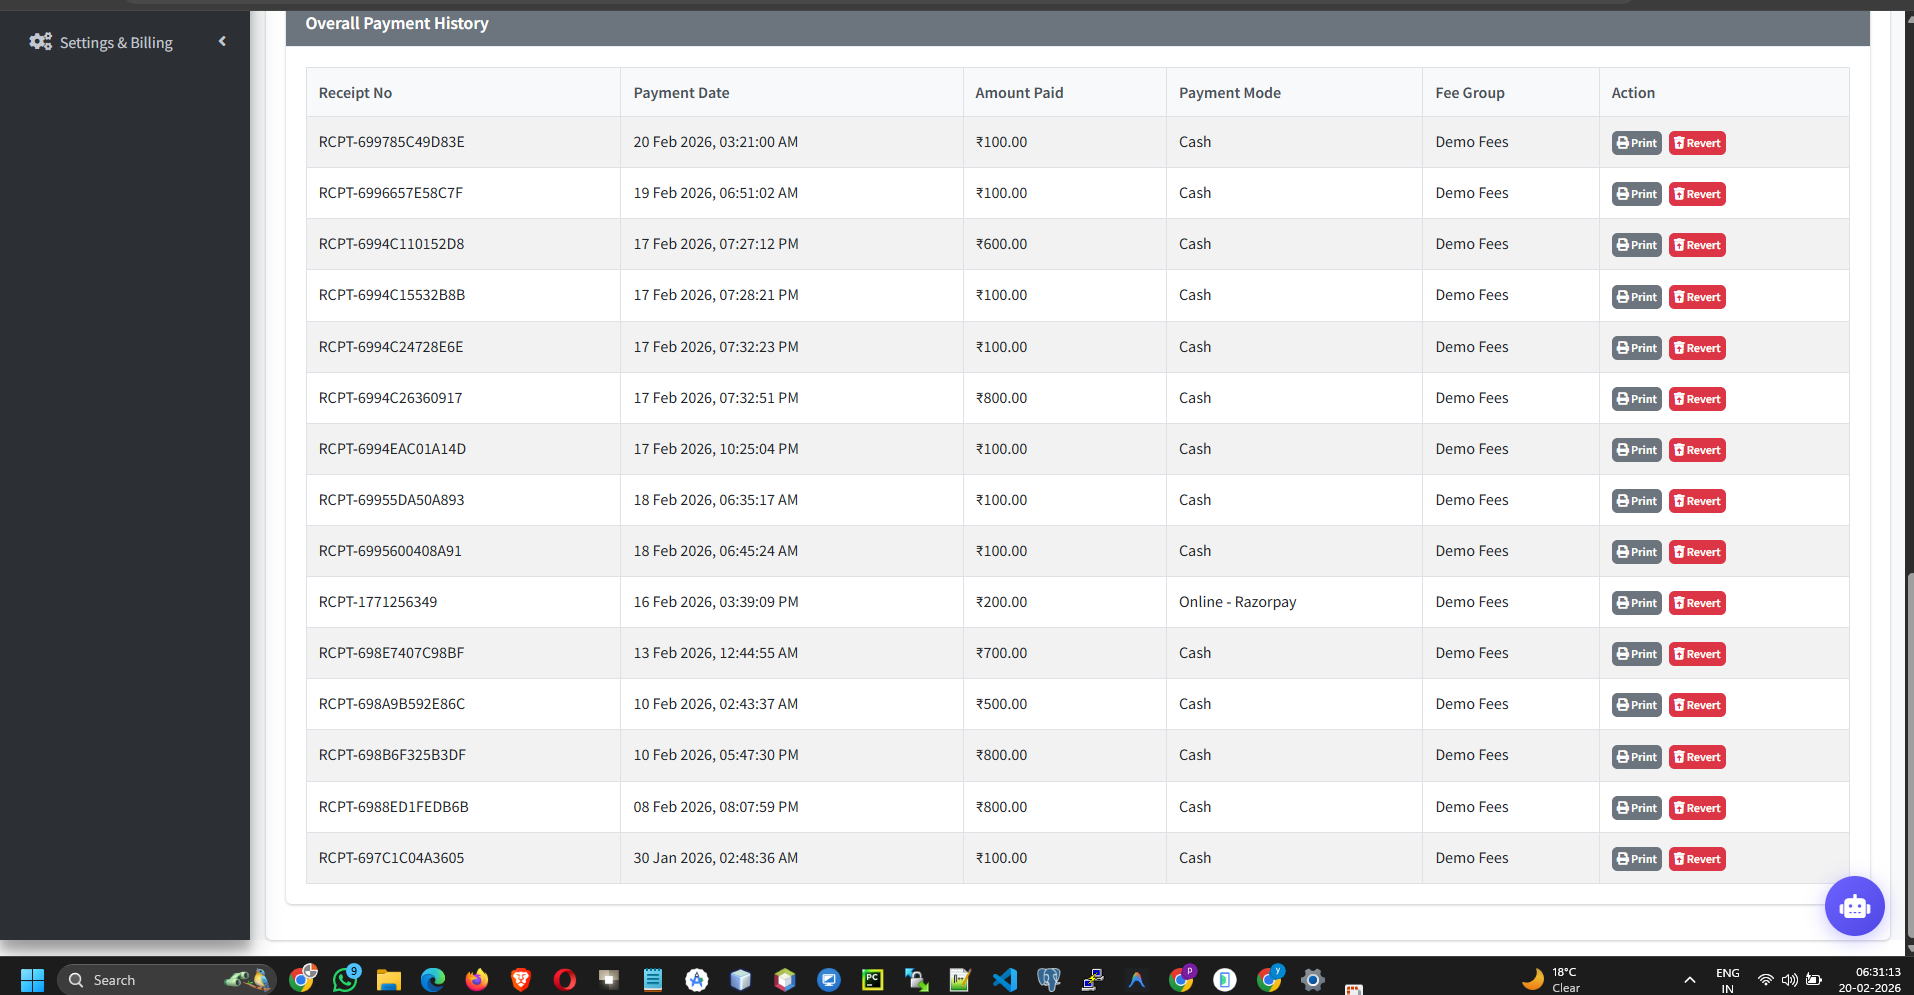
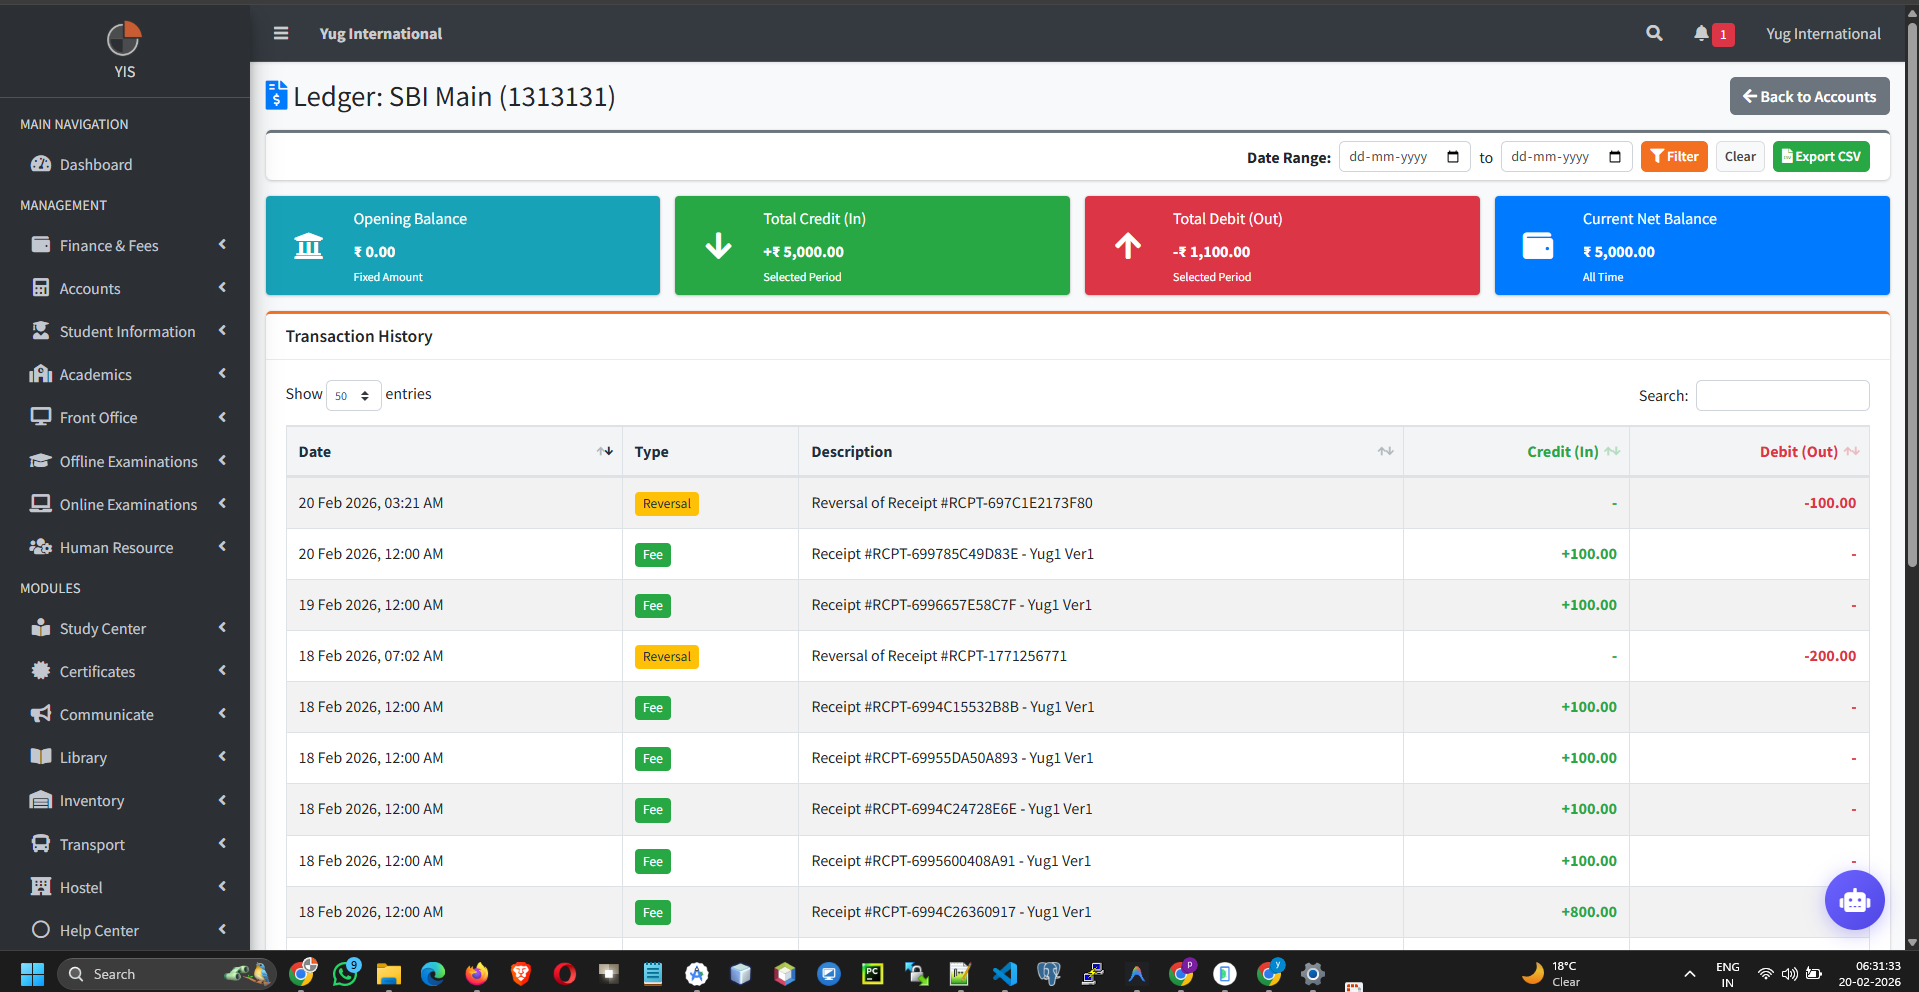
4. Transaction Reversals
Fixing cashier errors cleanly.
If a cashier typos $5000 instead of $500, do NOT edit it manually in the database.
- Go to the student's Payment History and click the Revert (Undo) icon next to the receipt.
- Automated Ledger Fix: The controller soft-deletes the receipt, restores the "Due Amount" on the fee structure, and automatically reverses any Wallet Credits/Debits that occurred during that specific transaction.