Student Information Management
Centralized management of student profiles, admissions, academic history, and auto-generated credentials.
SaaS Limits: Your ability to add new students is
governed by your active Subscription Plan. If you hit your `max_students` limit, the admission form will be
locked until you upgrade.
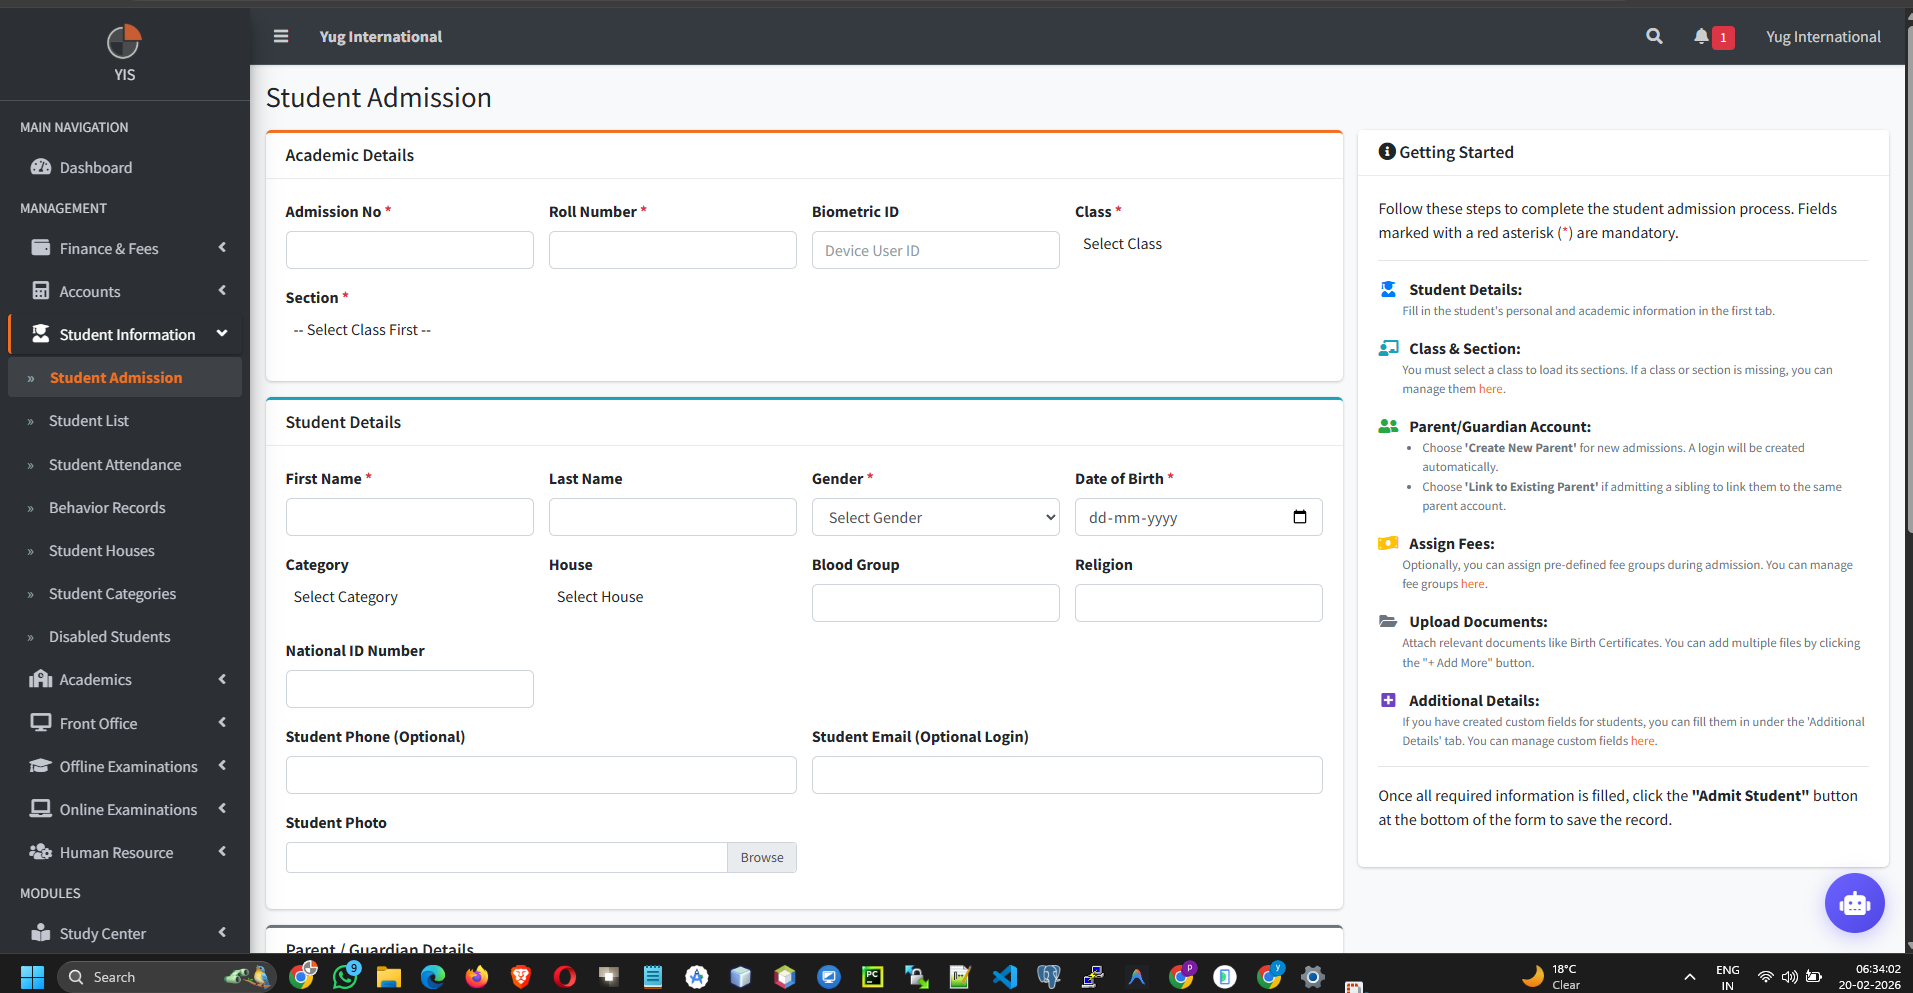
1. Student Admission
Enroll new students into the system while automatically generating their parent/student portal logins.
- Navigate to Student Information > Student Admission.
- Step 1: Academic & Biometric
- Admission No & Roll No: Unique identifiers. required.
- Biometric ID: Essential for ZKTeco/Fingerprint attendance sync.
- Class & Section: The student's placement in the current active Academic Session.
- Step 2: Parent/Guardian Linking (Crucial!)
- New Parent: Creates a brand new Parent Portal account.
- Existing Parent: Crucial for siblings! Search the database to link the new student to an existing parent. This ensures the parent only needs *one* app login to monitor multiple children.
- Step 3: Auto-Generated Credentials
Upon clicking save, the system securely generates AES-256 hashed credentials:
- Student Login: Username =
Student Email(orS[AdmissionNo]). Password =[AdmissionNo][DOB:ddMMyyyy]. - Parent Login: Username =
Parent Email(orP[FatherPhone]). Password =[FatherPhone]or random string.
- Student Login: Username =
Smart Notifications: If WhatsApp or SMTP is configured
in your settings, these credentials are instantly broadcasted to the registered mobile numbers/emails upon
admission!
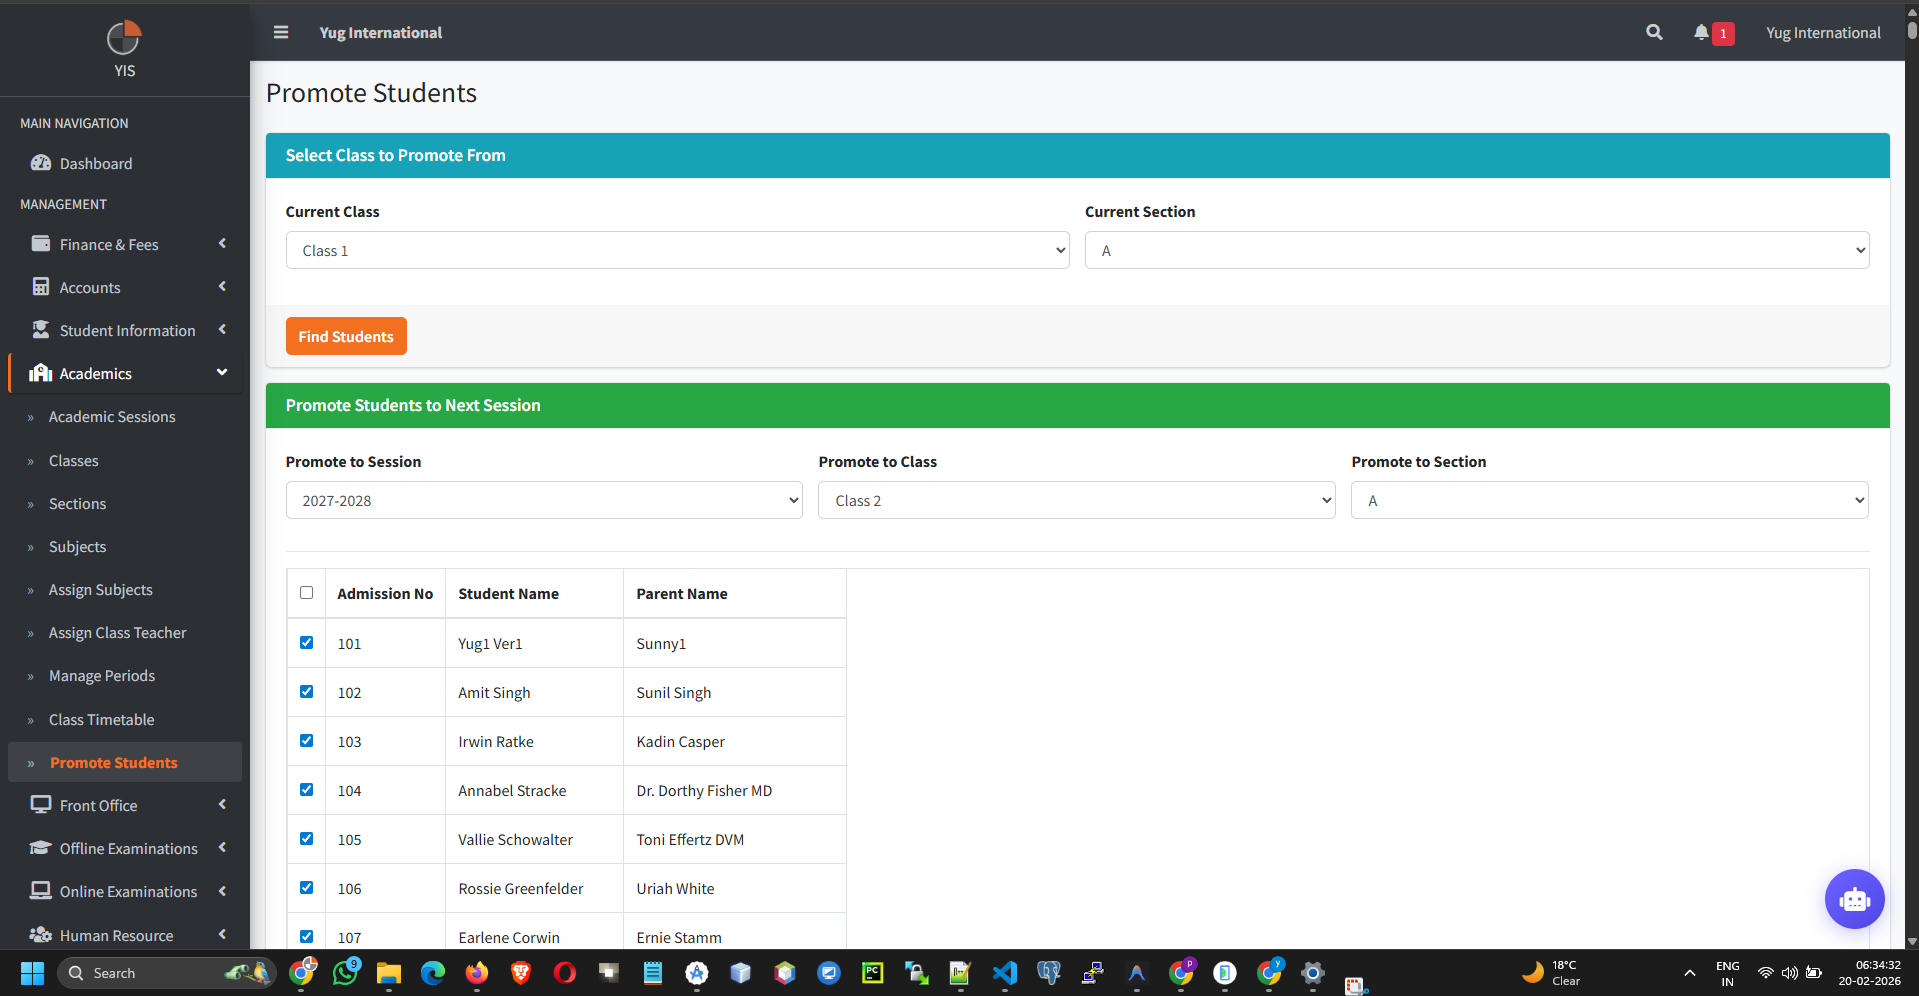
2. Academic History & Promotion
Managing the student's academic journey from one year to the next.
NEVER EDIT THE CLASS MANUALLY: Do NOT edit a student's
profile to change their class at the end of the year. This wipes their academic history. You must use the
Promotion tool.
- Go to Academics > Promote Students.
- Select the Current Session and the Target Session (Next Year).
- Choose the target class (e.g., from Class 5 to Class 6).
- Check the boxes of the students who passed.
- Click Promote.
Behind the scenes: The system alters the historic `StudentSession` record status to 'promoted' and generates a fresh, clean slate session for the new year, preserving past fee ledgers and exam marks flawlessly.
3. Disabling vs Deleting Students
Handling dropouts, expulsions, or graduated students.
- The Problem with Deleting: Hard-deleting a student wipes their financial history, creating accounting black holes.
- The Solution (Disable): Navigate to the Student List, click the red Disable (Thumb Down) icon.
- Impact: The student loses app access. They are removed from active attendance registers. However, their past fee receipts and exam history remain fully accessible in the Disabled Students ledger.
4. Bulk Uploads & Custom Data
Mass operations for high-volume schools.
- Bulk Import: Download the CSV template, fill the data, and mass-import hundreds of students. Ensure `Date of Birth` matches the exact formatting required by the system.
- Categories & Houses: Standardize grouping (e.g., "OBC", "General", "Blue House"). This data feeds directly into multi-dimensional reporting.
- Custom Fields: If your school needs data not present natively (e.g., "Transportation Zone ID"), create a Custom Field. It seamlessly injects itself into the Admission Form and DataTables.
| Best Practice | Avoid |
|---|---|
| Resend credentials via the Profile Page > Resend Credentials button if parents forget passwords. It resets to the default secure algorithmic formula. | Leaving the "Phone" fields blank. Without them, emergency SMS/WhatsApp broadcasts will fail silently. |